How To Add Layer To Wall Prior To Tiling
How To Prepare Your Walls For Tiling So Tiles Can Stick For Good Fantastic Handyman Blog

Wall Tile Installation Methods Tile Doctor

Toledo Tile Stencil In 2020 Brown Tile Bathroom Floor Makeover Bathroom Wall Tile

Bedrosians Tile And Stone On Instagram Square Tiles Are The Perfect Alternative To The Classic Subway And Add A Lay Green Bathroom Bathrooms Remodel Interior

Pin On Walk In Shower Ideas And Inspiration

How To Tile A Bathroom Wall Granada Tile Cement Tile Blog Tile Ideas Tips And More In 2020 Bathroom Wall Bathroom Tile Installation Bathroom
Apply the last layer of skim coat and use a medium sized sandpaper to achieve a rough texture.
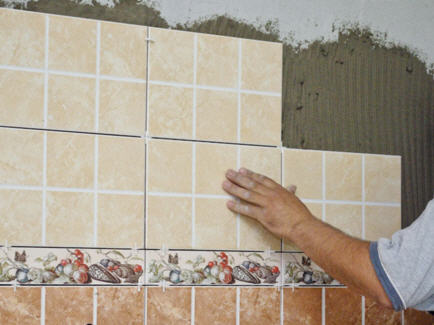
How to add layer to wall prior to tiling.

Safi Tile Stencil In 2020 Diy Bathroom Decor Tile Stencil Brick Exterior House

Before And After A Clever 400 Upgrade For Rental Bathroom Tiles Tile Bathroom Bathroom Remodel Tile Bathroom Wall Tile

Tumbling Blocks Stencil In 2020 Royal Design Studio Stencil Floor Stencils Patterns Stenciled Floor

The Best Before After Stencil Projects Painting Tile Floors Painting Ceramic Tile Floor Flooring
Can You Tile Over Drywall Drywall Maine

Faq Can I Tile Over Existing Tiles Ifixit

31 Diy Projects That Will Make Your House Look Amazing Exterior Home Remodeling Diy Updating House

5 Tips For Updating Your Bathroom With The Crate And Barrel Gift Registry Crate And Barrel 100 Layer Cake Registr Bathrooms Remodel Bathroom Interior Home

In This Downtown Condo We Creatively Separated The Shower From The Toilet With Two Frosted Glass Panels Adding Another Laye Stud Walls Glass Tile Glass Panels

Elegant Aqua Tiled Shower In 2020 Shower Tile Aqua Tiles Shower Wall

The Renovation Hack That Will Save You 1000s Bathroom Tile Floor Stencils In 2020 Stenciled Floor Moroccan Wall Stencils Decor Interior Design

Calcutta Polished Porcelain Discontinued Porcelain Tile Bathroom Bathroom Tile Designs Marble Tile Bathroom

Before After Stencil Transformations You Need To See In 2020 Tile Stencil Royal Design Studio Stencil Stencils Wall

Before You Remodel 6 Tile Trends You Should Know Modern Bathroom Tile Tile Trends Bathroom Tile Designs

Wall Tile Marble Falls Ma40 10x14 White Waters Horizontal Brick Joint Master Shower Tile Tile Bathroom Marble Falls

Subway Tile Around Window Sill The Use Of This Beautiful Double Butler Sink And White Metro Tiles Creates Kitchen Window Sill Shaker Kitchen Tiled Window Sill

Wall Pops Vinyl Peel And Stick Tile Floor Before And After Peel And Stick Tile Stick On Tiles Peel And Stick Floor

Guide To Layering Tile Trim And Profiles Tile Trim The Tile Shop Primitive Bathrooms
Https Encrypted Tbn0 Gstatic Com Images Q Tbn 3aand9gcszyt82vy2 O0mw Xzfcw2tpbxy2 Emmh0 Xmc6rwlcj5misvof Usqp Cau

Removing A Row Of Existing Tile Where Accent Tile Will Go We Used An Oscillating Tool And P Master Bathroom Renovation Bathroom Tile Designs Amazing Bathrooms

Before Basement Shower Shower Remodel Shower Tile Trendy Bathroom

How To Retile A Shower Bathroom Tile Diy Shower Remodel Shower Tile

Glued Glass Tile Around Plain Mirror Used E6000 Glue Put Thin Layer Of Glue On Both Surfaces And Let Dry Shower Tile Home Improvement Printed Shower Curtain

Pin By Sarah Hovis On For The Home Home Diy Tile Floor Diy Home Remodeling
Source : pinterest.com
