How To Add Overhang To Roof In Revit

Revitcity Com Roof Overhang Extension

Roof Overhang Problem Autodesk Community Revit Products

Creating An Overhang Youtube

Solved Roof Overhang Option Not Available For Some Roofs Autodesk Community Revit Products

Solved Roof Level Overhang Autodesk Community Revit Products
Revit 2014 Roof Eaves And External Wall Youtube
9 join roofs add opening to create dormer.
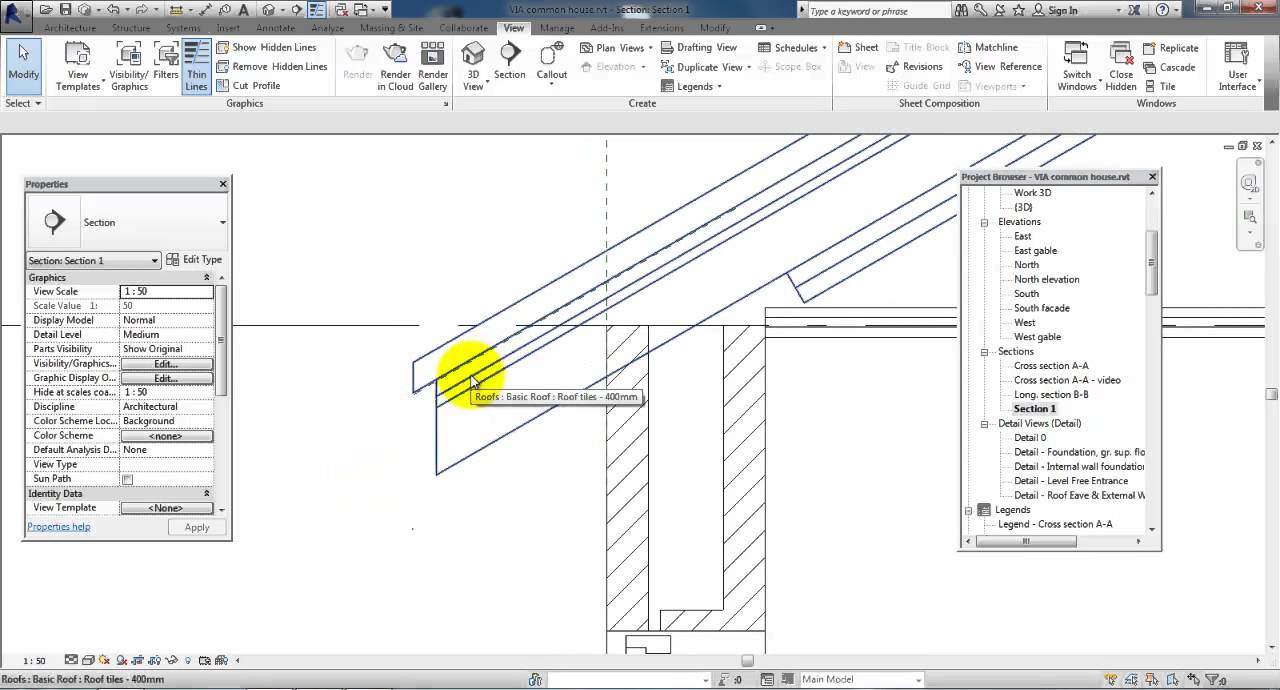
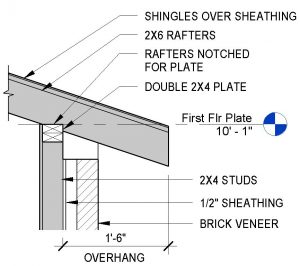
How to add overhang to roof in revit.

Revit Roof Tip 5 Activate Overhang On Picked Walls Roof Youtube
Overhangs And Wall Thicknesses In Revit Best Cad Tips

Revit Roof Edits Increasing The Overhang Youtube

Adding Roof Edge Dormers Revit Tutorial Lynda Com Youtube

Eaves Revit Products 2019 Autodesk Knowledge Network

Solved Roof Overhang Overlap Single Sketch Autodesk Community

Create A Roof By Footprint Revit Products 2016 Autodesk Knowledge Network

Trim Interscting Roofs Autodesk Community Revit Products

Solved Roof Not Overhanging Properly Autodesk Community Revit Products
Https Portal Imaginit Com Portals 0 Whitepapers Imaginit New Wp Revitroofs Pdf

Modify A Roof Revit Products 2019 Autodesk Knowledge Network

Prefab Roof Truss Overhang Issue Autodesk Community Revit Products

Revit Roof Basics 04 Intersect By Roof Join Cadclips Youtube
How To Show A Roof Overhang In A Plan View With Revit Imaginit Building Solutions Blog

Align Eaves In Revit Roof 3 Youtube

Various Basic Roofs In Revit Youtube

Revit Roof Tutorial Revit Curved Roof Youtube
Video Create A Dormer Revit Products 2019 Autodesk Knowledge Network
Https Encrypted Tbn0 Gstatic Com Images Q Tbn 3aand9gctdpd70owfkuahmj4cfljo6uzvyzcxflg5bevhh056uu5nw5i D Usqp Cau

Eave Square Cut Autodesk Community Revit Products

Creating Mansard Roof In Revit Youtube

Create Roof Trusses With Purlins In Revit Youtube

The Bim Jedi Formally The Revit Jedi Box Cornice With Overhang Rake Aka Pork Chop Roof

Solved Angled Soffit Autodesk Community Revit Products
Source : pinterest.com
